Morse Code Example
Table of Contents
Modified: November 28, 2022
Parts List
for this project, you will need:
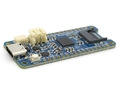
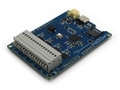
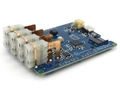
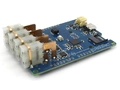
- (x1) R3aktor M0 Logger Board
- (x1) USB-C cable
- (x1) Solderless breadboard
- (x2) Jumper wires
- (x1) LED
- (x1) 220 to 4.7k Ohm Resistor
Hardware Setup
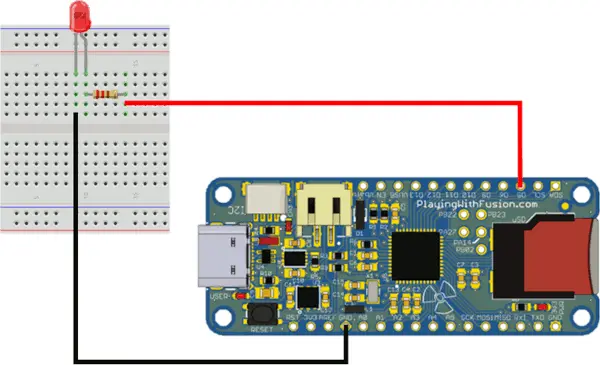
Place the LED in the breadboard. Connect the cathode in series with the resistor to pin D5 or the R3actor board. Connect the LED’s anode (the longer lead) to GND.
SD Card Setup
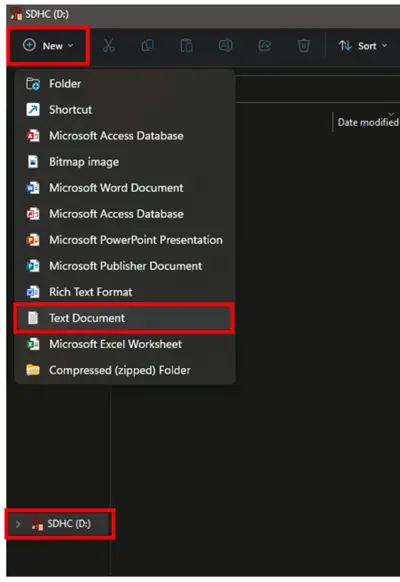
Connect the micro-SD card to a computer. Create an empty file in the root directory named morse.txt
If using Windows, open file explorer and navigate to the microSD card. In the top left, select New -> Text Document.
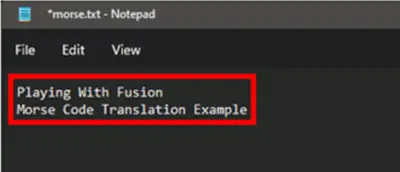
Open the file using your favorite text editor and insert the text you wish to translate into morse code.
If using Windows, open the text file by double clicking on it. Edit the text and then go to File -> Save.
Close the text file and safely eject the micro-SD card.
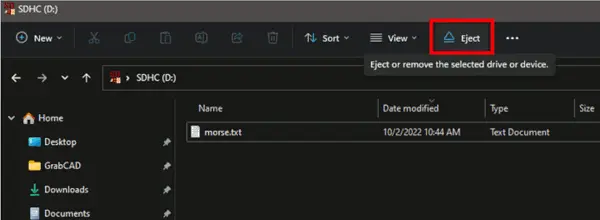
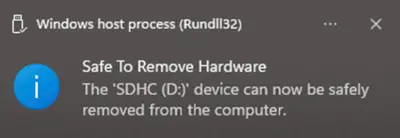
When this notification appears, it is safe to remove the micro-SD card from your computer.
Create Sketch (Software)
Connect the R3aktor board to your computer with the USB-C cable. The USB connection provides power to R3actor and provides a debug interface to allow programming.
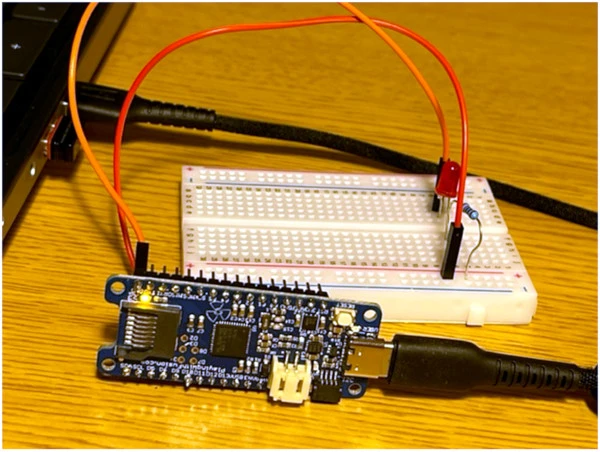
Insert the micro-SD card with the morse.txt file into the R3aktor board.
Open the Arduino IDE. Copy and paste this code:
- #include <SD.h>
- // Digital pin led is connected to
- // The constant LED_BUILTIN may be used instead of 5 to use the built-in LED on R3actor
- int morseLED = 5;
- // Base delay value in milliseconds
- int d = 100;
- char character;
- String letter;
- File sdFile;
- void setup() {
- pinMode(morseLED, OUTPUT);
- Serial.begin(9600);
- while (!Serial) {;}
- Serial.print("Initializing SD card...");
- if (!SD.begin(SDCARD_SS_PIN)) { // SDCARD_SS_PIN is the defined pin for the SD Card reader
- Serial.println("Initialization failed.");
- while (1);
- }
- Serial.println("Initialization done.");
- sdFile = SD.open("morse.txt", FILE_READ);
- if (sdFile) {
- Serial.println("File Opened");
- while (sdFile.available()) {
- character = sdFile.read(); // Read the next character from the text file
- letter = String(character); // convert that character into a string
- letter.toLowerCase(); // convert the string to lower case
- Serial.print(letter); // print the letter to the monitor
- translateCode(letter); // pass the letter into the translation function
- }
- sdFile.close();
- Serial.println("File Closed");
- } else {
- Serial.println("error opeining TextToTranslate.txt");
- }
- }
- // Morse Code Translation Functions
- void translateCode(String input) {
- if (input == "a") A();
- if (input == "b") B();
- if (input == "c") C();
- if (input == "d") D();
- if (input == "e") E();
- if (input == "f") f();
- if (input == "g") G();
- if (input == "h") H();
- if (input == "i") I();
- if (input == "j") J();
- if (input == "k") K();
- if (input == "l") L();
- if (input == "m") M();
- if (input == "n") N();
- if (input == "o") O();
- if (input == "p") P();
- if (input == "q") Q();
- if (input == "r") R();
- if (input == "s") S();
- if (input == "t") T();
- if (input == "u") U();
- if (input == "v") V();
- if (input == "w") W();
- if (input == "x") X();
- if (input == "y") Y();
- if (input == "z") Z();
- if (input == " ") wordDelay();
- if (input == "0") zero();
- if (input == "1") one();
- if (input == "2") two();
- if (input == "3") three();
- if (input == "4") four();
- if (input == "5") five();
- if (input == "6") six();
- if (input == "7") seven();
- if (input == "8") eight();
- if (input == "9") nine();
- }
- // Morse Code Key: Letters
- void A(){ dot(); dash(); letterDelay(); }
- void B(){ dash(); dot(); dot(); dot(); letterDelay(); }
- void C(){ dash(); dot(); dash(); dot(); letterDelay(); }
- void D(){ dash(); dot(); dot(); letterDelay(); }
- void E(){ dot(); letterDelay(); }
- void f(){ dot(); dot(); dash(); dot(); letterDelay(); }
- void G(){ dash(); dash(); dot(); letterDelay(); }
- void H(){ dot(); dot(); dot(); dot(); letterDelay(); }
- void I(){ dot(); dot(); letterDelay(); }
- void J(){ dot(); dash(); dash(); dash(); letterDelay(); }
- void K(){ dash(); dot(); dash(); letterDelay(); }
- void L(){ dot(); dash(); dot(); dot(); letterDelay(); }
- void M(){ dash(); dash(); letterDelay(); }
- void N(){ dash(); dot(); letterDelay(); }
- void O(){ dash(); dash(); dash(); letterDelay(); }
- void P(){ dot(); dash(); dash(); dot(); letterDelay(); }
- void Q(){ dash(); dash(); dot(); dash(); letterDelay(); }
- void R(){ dot(); dash(); dot(); letterDelay(); }
- void S(){ dot(); dot(); dot(); letterDelay(); }
- void T(){ dash(); letterDelay(); }
- void U(){ dot(); dot(); dash(); letterDelay(); }
- void V(){ dot(); dot(); dot(); dash(); letterDelay(); }
- void W(){ dot(); dash(); dash(); letterDelay(); }
- void X(){ dash(); dot(); dot(); dash(); letterDelay(); }
- void Y(){ dash(); dot(); dash(); dash(); letterDelay(); }
- void Z(){ dash(); dash(); dot(); dot(); letterDelay(); }
- // Morse Code Key: Numbers
- void zero() { dash(); dash(); dash(); dash(); dash(); letterDelay(); }
- void one() { dot(); dash(); dash(); dash(); dash(); letterDelay(); }
- void two() { dot(); dot(); dash(); dash(); dash(); letterDelay(); }
- void three() { dot(); dot(); dot(); dash(); dash(); letterDelay(); }
- void four() { dot(); dot(); dot(); dot(); dash(); letterDelay(); }
- void five() { dot(); dot(); dot(); dot(); dot(); letterDelay(); }
- void six() { dash(); dot(); dot(); dot(); dot(); letterDelay(); }
- void seven() { dash(); dash(); dot(); dot(); dot(); letterDelay(); }
- void eight() { dash(); dash(); dash(); dot(); dot(); letterDelay(); }
- void nine() { dash(); dash(); dash(); dash(); dot(); letterDelay(); }
- // Morse Code Functions
- void dot() {
- Serial.print("*");
- digitalWrite(morseLED, HIGH);
- delay(d*2);
- digitalWrite(morseLED, LOW);
- delay(d*4);
- }
- void dash() {
- Serial.print("-");
- digitalWrite(morseLED, HIGH);
- delay(d*6);
- digitalWrite(morseLED, LOW);
- delay(d*4);
- }
- // Delay in between letters
- void letterDelay() {
- Serial.print(" ");
- delay(d*10);
- }
- // Delay in between words
- void wordDelay() {
- Serial.println("");
- delay(d*20);
- }
- // The loop is not needed for this
- void loop() {}
Program R3actor
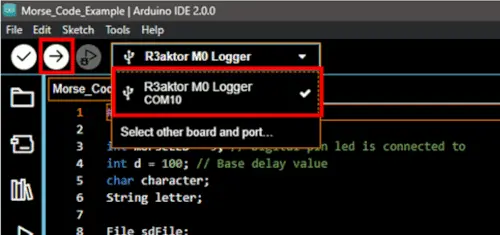
Select the R3aktor board in the Arduino IDE and then select the upload button (the right arrow).
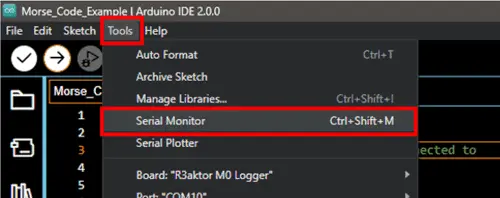
Open the serial monitor by going to Tools -> Serial Monitor to verify everything is working correctly.
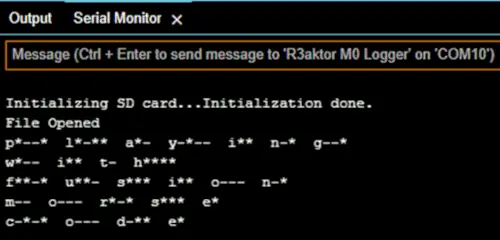
You will see the output in the Serial Monitor matching the output on the LED. A * represents a dot and a – represents a dash. The appearance of each character will correspond with the length of each flash of the LED.
Related Files
| morse.ino | R3actor morse code example |
External Links
No related links.